How I Start My Tomato & Pepper Seeds

How I Start My Tomato & Pepper Seeds
We will explain the process we use step by step from selecting the varieties we are going to grow to how we start them. We will also add some other methods we know other fellow gardeners used to start their seeds. Keep in mind there are many ways to start tomato and pepper seeds it is which way works the best for you, there is no right or wrong way.
Beginning Process Before Starting Seeds
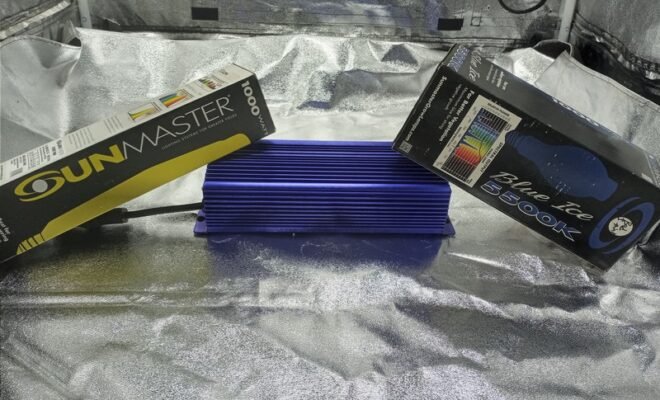
What we do first is we go through all the seeds we have purchased over the years and the new ones we purchased before the new season. We comprise a list of everything we are going to start for the new season and write it down. After the list is complete, I cut up blinds to make my labels for each variety. We also make sure we have all my supplies ready so when we start writing labels and start my seeds, we are not running out to try to find supplies to keep starting seeds. All the supplies I make sure we have ordered and have to start seeds are trays, heat mats, containers, inserts, domes, soil, lights and new bulbs if needed. Below is all the supplies we use and where we buy them from.
Seeds Starting Supplies
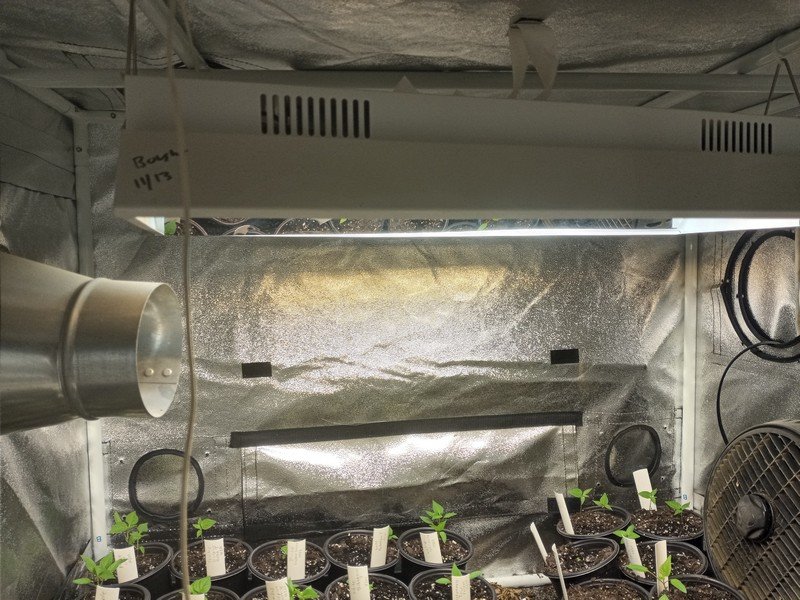
Supplies we use 1020 trays, We buy them in 10 packs with no drainage holes. The reason we do not use the ones drainage holes are these are less messy for me. Next, you can use inserts to maximize how many seeds you are starting, but we use 4 inch(ca. 10 cm) coex cups because we are not limited on space, and we do not have to worry about up potting later. We get all these supplies above at the Greenhouse Megastore they are the most reasonable, and we have the option to buy these items in larger quantity to save money. Next we use heat mats, where it seems you can get 2 of them on amazon for about $25. The soil we use is Fox Farm Happy Frog Soil at Rural King some gardeners prefer Promix BX Soil but for us and where we live Fox Farm Happy Frog is more reasonable in price and more available. Next, we use domes for on top of my trays to keep the moisture in when under lights, this acts like mini greenhouses. The lights we use for seed starting are Grow Bright Tek Two we got the domes and lights from HTG Supply which are located near me, but they do sell online. There are other places that sell domes and lights on the internet cheaper, be sure to check reviews and quality before buying, these grow Bright Tek Two light have lasted over 10 years for me. Also check into LED lights they will be cheaper on electric, but not as much heat and if using any type of lights be sure to get a timer it makes life a lot easier we prefer digital timers we get from Harbor Freight they are easy to program and have battery back-ups in them as well. Another bit of advice is most of the grow shops get their supplies from a wholesaler and one of the biggest wholesalers is Hydrofarm, so you can look on their website and ask your local grow shop to special order your item in if they deal with Hydrofarm. Lastly, I start my seeds in AgroMax tents, but most people start seeds on multiple shelves on top of each other with lights under each shelf to save space also.
Seed Starting Process Step By Step
Since we have a list of all the seeds we are going to grow and the list is mostly in alphabetical order. We start pulling the seeds out of my books, I am writing my tags with the name and date of what and when we are starting the seeds. The reasons we write the dates is because when we start planting in the ground we want the older plants to go in first and also to see during the season if they are early, mid, or late season varieties. Next we fill 15 cups (3.55 l) up with soil and place them in my 1020 tray. Then we take my number 2 pencil and poke holes in the soil just using the sharpened end of the pencil up to where the color starts on the pencil. After that we put 3 seeds in the cup along with the tag and cover the seeds over with soil and add a bit of water to the cups as well, we do 2-3 cups per 1 variety. When we finished all the seeds for that tray are, we place the tray in my tent. We do this process 4 more times once the tent is full I zip it up, so it is completely dark for about a week. In about a week, most of the seeds should be sprouted. Then I place the domes on top of the trays for about 2-3 weeks and turn my lights on, so they have 18 hours of light and six hours of dark. We set my timer to come on at 6pm and go out at 12pm, the reason for this is off-peak electric hours are from 6pm-6am. We found this process works well for us, below we mention a couple other was to start seeds it is just finding or configuring a way that works well for you.
Added note: Tomatoes and pepper seeds are to be started 6-8 weeks before going into the ground. We start our tomato seeds in February, 12-14 weeks before going into the ground. The peppers we start at the end of November, 22 weeks before going into the ground because peppers are slow to grow. Also, the old rule of thumb more roots more fruits.
Other Ways To Start Seeds
You can start the seeds in trays the same way and place them in a greenhouse. But with a greenhouse you have to make sure it has heat if you are in a cold zone, so plants do not die. For heat, wood is the cheapest to use, but you can us gas and electric. Wood and gas heating sources are better for your plants since both sources give off carbon dioxide, which plants love. Another method is winter sowing where you get milk jugs cut them in half, fill them halfway with soil and plant your seeds in the soil. Next you put the jugs back together and let your plants grow with the weather, they start sprouting as the weather gets warmer.


